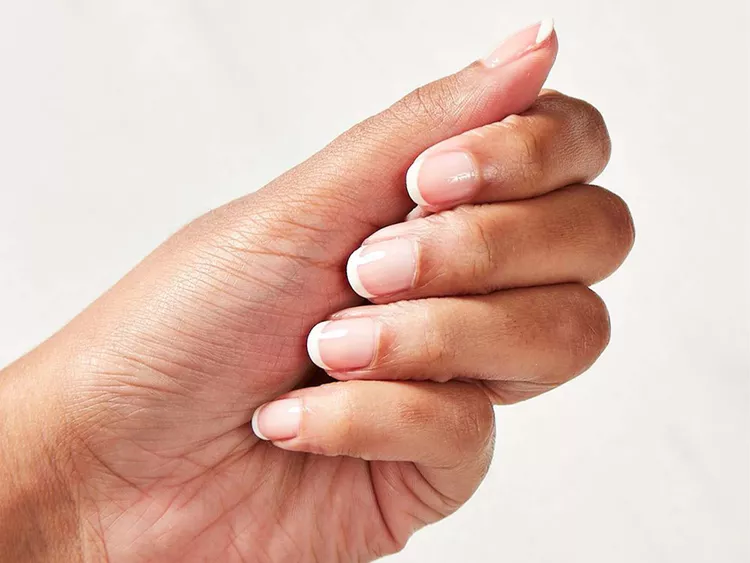
Are you eager to master the art of creating a flawless French manicure on your own? Look no further! In this guide, we’ll walk you through the step-by-step process, ensuring that you’re well-equipped with the knowledge and techniques needed for stunning DIY nails. From essential preparations to the intricate details, embark on this journey to perfect your at-home French manicure game. Let’s dive in!
Preparation: Ensuring Everything is in Place
Materials Needed
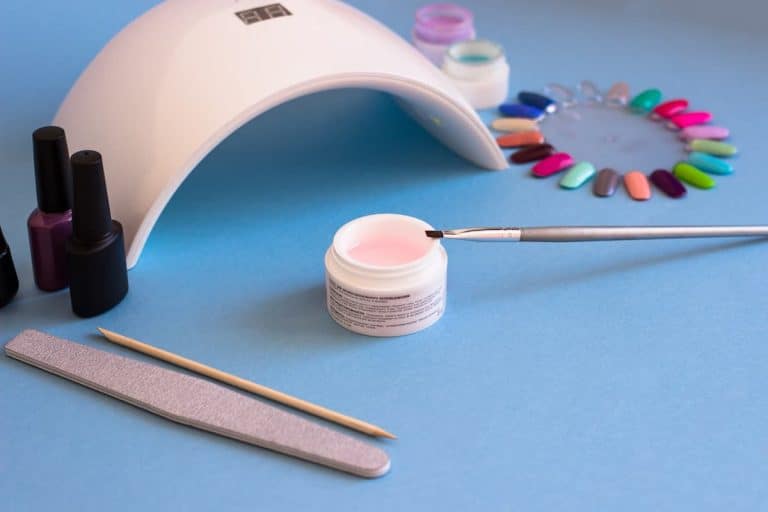
To embark on your journey to a perfect DIY French manicure, make sure you have the essential tools and materials ready. Here’s a comprehensive list to guide you:
| Materials | Description |
|---|---|
| Transparent Base Coat | Creates a smooth base for the manicure. |
| White Nail Polish | Used for the classic white tip of the French manicure. |
| Nail Tape | Essential for achieving clean and precise lines. |
| Manicure Tools | Nail clippers, files, and buffers for nail preparation. |
| Clear Top Coat | Seals the manicure, adding durability and shine. |
With these materials at your fingertips, you’re ready to dive into the world of DIY French manicures. Let’s proceed to the next steps for a salon-worthy finish!
Basic Steps: Crafting the Perfect Base
Trimming and Shaping
To lay the groundwork for a flawless French manicure, it’s crucial to master the art of trimming and shaping your nails correctly. Follow these steps to ensure a solid foundation:
- Start with Clean Nails: Begin by removing any existing nail polish and cleaning your nails thoroughly. This provides a blank canvas for the manicure.
- Soak Your Nails: Soak your fingertips in warm, soapy water for a few minutes to soften the cuticles, making them easier to push back.
- Shape with Precision: Use a quality nail clipper to trim your nails to the desired length. Opt for a square or slightly rounded shape for the classic French manicure look.
- Smooth the Edges: Employ a nail file to shape the edges and smooth any rough spots. This step ensures that your nails have an even and polished appearance.
- Buff for Shine: Gently buff the surface of your nails to enhance shine and promote a healthy nail bed. Be cautious not to over-buff, as this can weaken the nails.
By following these meticulous steps, you’ll establish a strong and well-groomed foundation, setting the stage for the perfect French manicure. Let’s move on to the next phase of creating stunning nails!
French Design: Clever Application of White Nail Polish
Tape Technique
Achieving the crisp white edges of a French manicure involves mastering the art of the tape technique. Follow these steps to create a clear boundary with white nail polish for an elegant French design:
- Preparation is Key: Before applying any polish, ensure your base coat is completely dry. This prevents smudging and ensures a clean result.
- Choose Quality Tape: Opt for thin, flexible tape, such as nail striping tape or masking tape, to create precise lines without damaging your base coat.
- Position the Tape: Carefully place the tape along the lower edge of your nail, leaving only the tip exposed. Adjust the angle to achieve your desired French tip width.
- Press Firmly: Secure the tape by pressing it firmly onto the nail, especially along the edges. This prevents polish from seeping underneath.
- Apply White Polish: Using your chosen white nail polish, carefully paint the exposed nail tip within the taped area. A steady hand ensures a neat and even application.
- Remove the Tape: While the white polish is still wet, gently peel off the tape at a slight angle. This reveals a sharp line, creating the perfect French tip.
By mastering the tape technique, you’ll elevate your French manicure to new heights of sophistication. Ready to add those final touches? Let’s explore the next steps in refining your DIY nail artistry!
Finishing Touches: Embellishments and Decoration
Dazzling Accents
Elevate your French manicure to a new level of uniqueness by incorporating dazzling accents. Here’s a guide on how to add sparkle, patterns, or other embellishments for a truly eye-catching finish:
- Gather Your Embellishments: Collect an assortment of rhinestones, glitter, or decals to suit your desired manicure style. Ensure they complement the chosen color palette.
- Plan Your Design: Before applying any embellishments, plan where you want them on your nails. Consider creating a consistent pattern or accentuating specific nails for variety.
- Use Nail Glue or Clear Polish: For heavier embellishments, such as rhinestones, use nail glue for secure adhesion. For lighter decorations, clear nail polish can often suffice.
- Apply with Precision: Use a tweezer or a dotting tool to place the embellishments precisely. This ensures accurate positioning without smudging the surrounding polish.
- Experiment with Patterns: Get creative with patterns or combine different embellishments for a dynamic and personalized look. Experimentation is key to finding a design that speaks to you.
- Seal with a Top Coat: Once satisfied with your design, seal the embellishments with a clear top coat. This not only adds shine but also ensures a longer-lasting manicure.
By mastering the art of embellishment, you’ll transform your French manicure into a captivating work of nail art. Ready to unveil your unique style? Let’s explore the final steps to maintain and showcase your DIY masterpiece!
Final Touch: Sustaining Timeless Beauty
Application of Clear Base Coat
Ensure the longevity and enduring beauty of your French manicure by correctly applying a clear base coat. Follow these steps to guide you in enhancing the durability and preserving the aesthetic allure of your DIY masterpiece:
- Wait for Full Drying: Before applying the clear base coat, ensure that your nail art, including any embellishments, is completely dry. This prevents smudging or altering the design.
- Select a Quality Base Coat: Choose a high-quality transparent base coat with protective properties. This not only strengthens your nails but also acts as a shield against chipping and fading.
- Apply Evenly: Using steady strokes, apply the clear base coat evenly across each nail. Pay special attention to the tips and edges for comprehensive coverage.
- Seal the Edges: To reinforce the edges of your nails, run the brush along the tips, effectively sealing the entire manicure. This step adds an extra layer of protection.
- Allow Ample Drying Time: Patience is key. Allow the clear base coat to dry completely before engaging in any activities to prevent smudges or imprints.
- Maintain with Regular Touch-ups: To extend the life of your French manicure, periodically apply additional clear coats. This helps maintain the shine and integrity of your nail art.
By following these steps, you not only enhance the durability of your DIY French manicure but also ensure it stays as beautiful as the day you created it. Congratulations on mastering the art of the perfect at-home French manicure!


